Download SteelSeries Engine to control the Wireless Transmitter from PC, and to integrate with Engine Apps (like displaying Discord info on the OLED screen). steelseries.com/engine
Platforms
Windows 7 +
Mac OS X 10.8 +
120 MB of free hard drive space for installation
* DTS Headphone: X 7.1 Surround available on Windows only. Software installation required.
PC
PS4 (Pro / Original / Slim)
Platforms
Windows 7 +
Mac OS X 10.8 +
120 MB of free hard drive space for installation
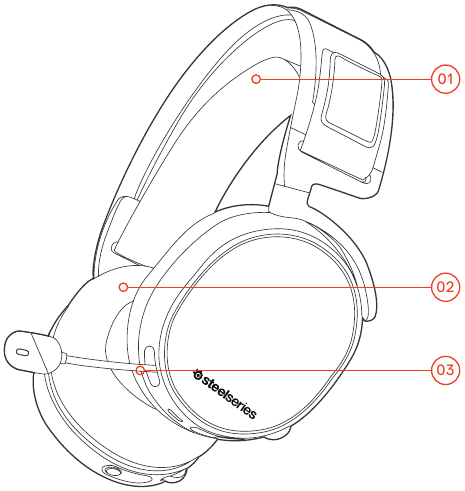
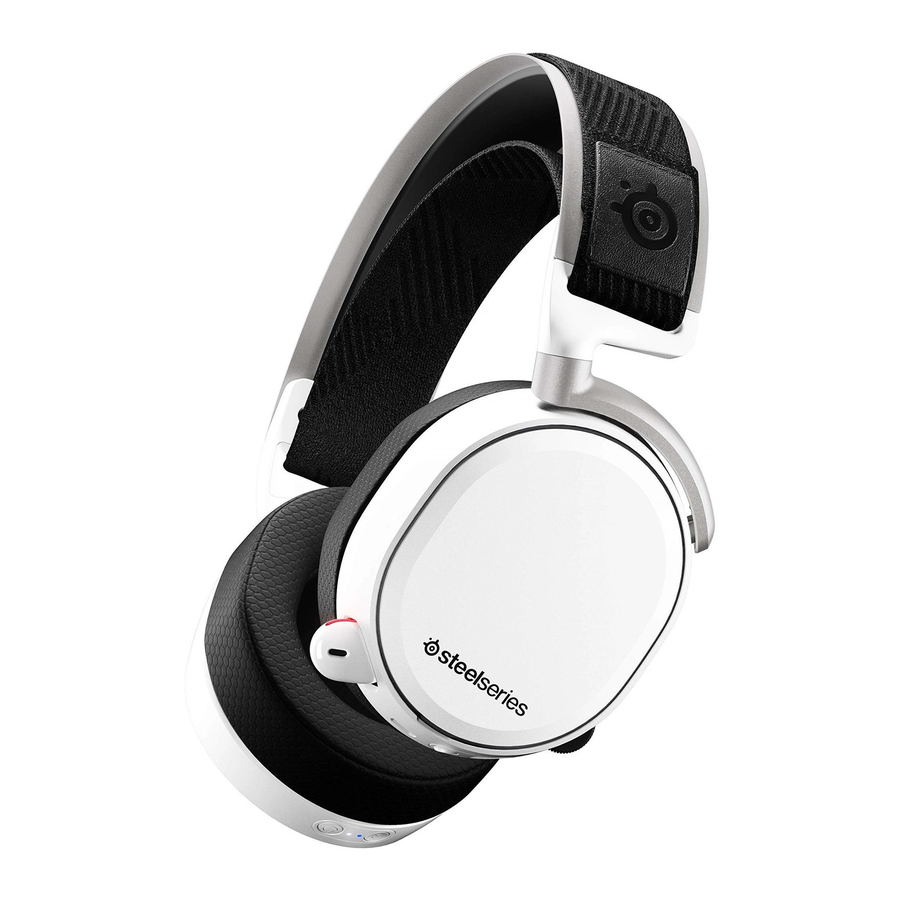
01. Ski goggle headband *
02. Airweave ear cushions *
03.ClearCast microphone
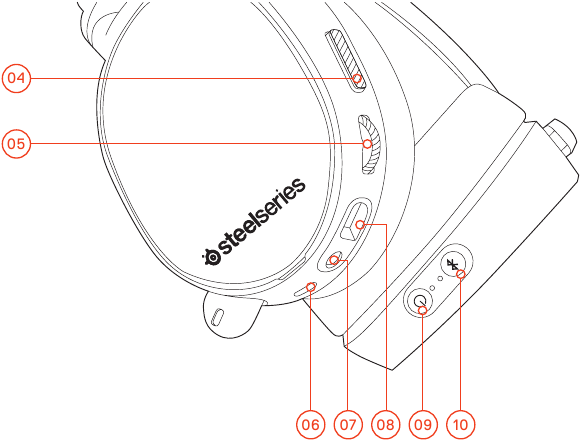
04. Microphone mute button
05. Control Wheel
06. Micro-USB jack (for charging and firmware updates)
07. Headphone share jack
08. Mobile audio cable jack
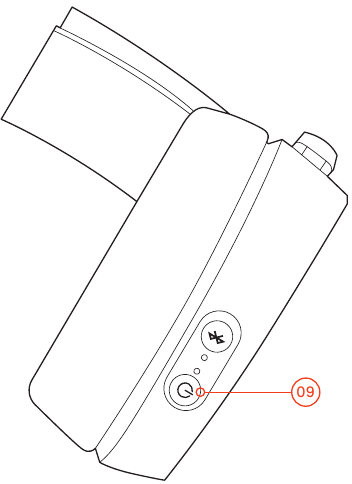
09. Power button
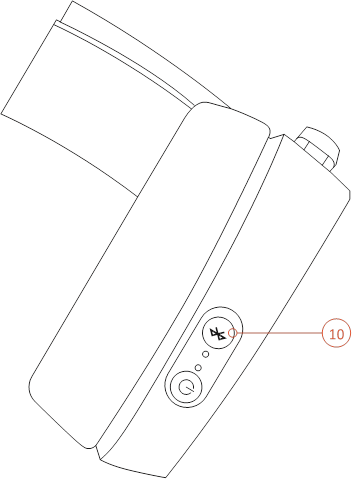
10. Bluetooth button

POWER ON
Power the headset on or off press and hold the power button for 2 seconds.
PAIRING
The headset is already paired to the transmitter when it arrives. In the event you need to re-pair, go into the pairing menu and follow the on-screen instructions
Option > System > Pairing

POWER ON
To turn Bluetooth off, press and hold the Bluetooth button
PAIRING
With Bluetooth off, press and hold Bluetooth button for 6 seconds.
CONTROL
 ANSWER/END VOICE CALL
single · press the Bluetooth button
 PLAY/PAUSE MUSIC
single · press the Bluetooth button 
 SKIP TRACK
double · · press Bluetooth button 
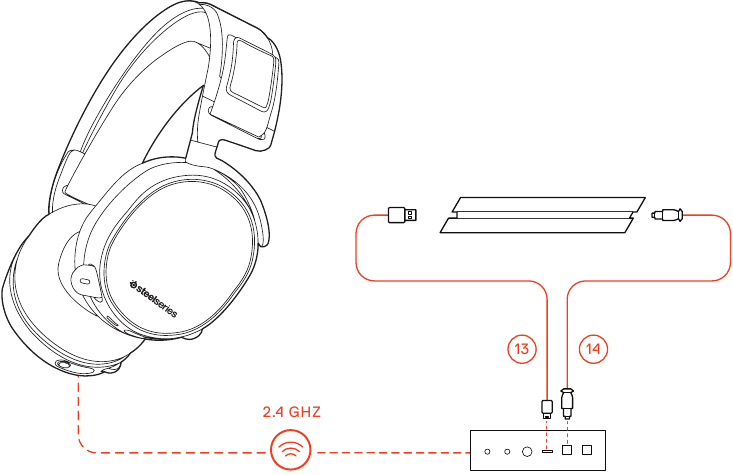
 from the Wireless Transmitter to the front of the PS4
 from the Wireless Transmitter to the back of the PS4
Main Menu > Source > PS4
PS4 SETTING > SOUND AND SCREEN > AUDIO OUTPUT SETTING
| Primary Output Port | Digital Out (Optical) |
| Audio Format (Priority) | Bitstream (Dolby) |
| DEVICES > AUDIO DEVICES | |
| Output to Headphones | Chat Audio |
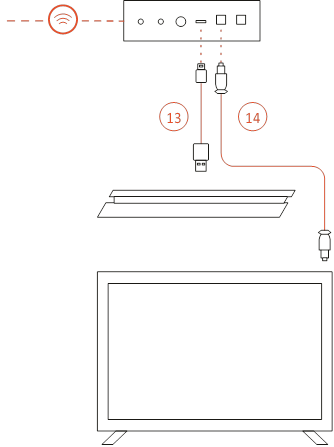
 from the Wireless Transmitter to the optical output of your TV or HDMI adapter
 from the Wireless Transmitter to the USB port on the front of the PS4
* The PS4 Slim does not have an optical output. For full functionality you will need to connect the Wireless Transmitter to the optical output of a TV or an HDMI adapter. If no optical is available proceed to the next page.
Main Menu > Source > PS4
PS4 SETTING > SOUND AND SCREEN > AUDIO OUTPUT SETTING
| Primary Output Port | Digital Out (Optical) |
| Audio Format (Priority) | Bitstream (Dolby) |
| DEVICES > AUDIO DEVICES | |
| Output to Headphones | Chat Audio |

Main Menu > Source > PS4
DEVICES > AUDIO DEVICES
| Output to Headphones | All Audio |
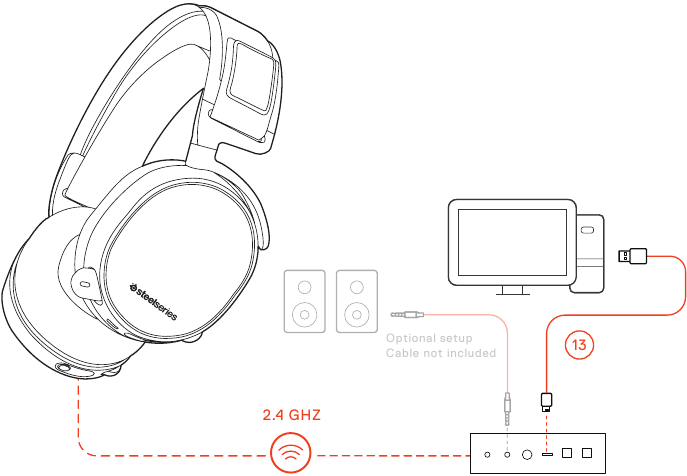

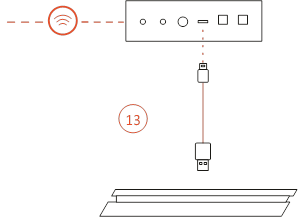
Main Menu > Source > PC
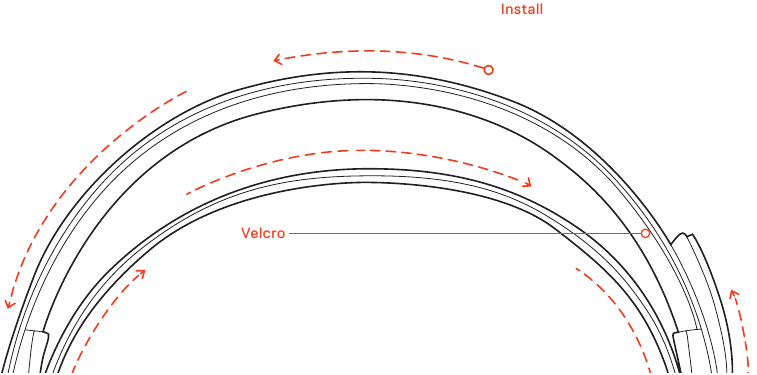
Install
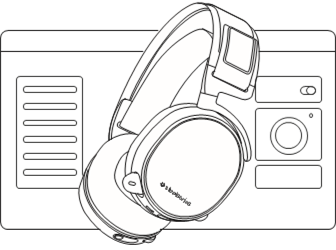
Direction of headband installation
Velcro
Tighten or loosen the Velcro straps on the sides of the headband to achieve the desired fit
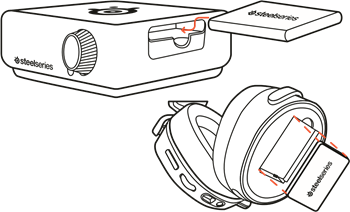
To charge additional battery, place the battery inside the charging slot on the transmitter
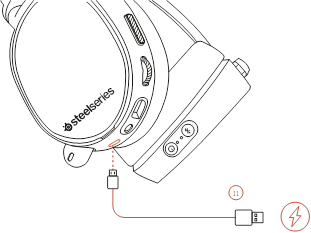
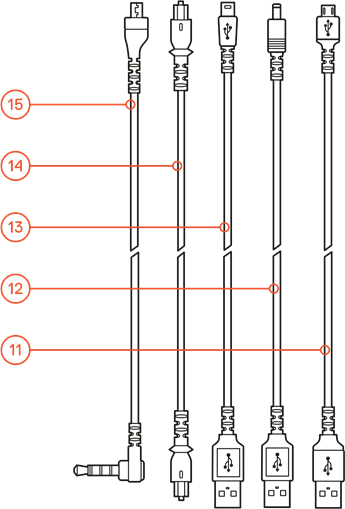
To charge headset while using or on the go, connect the Mobile Charging Cable  from the micro-USB port on the headset to any USB power source

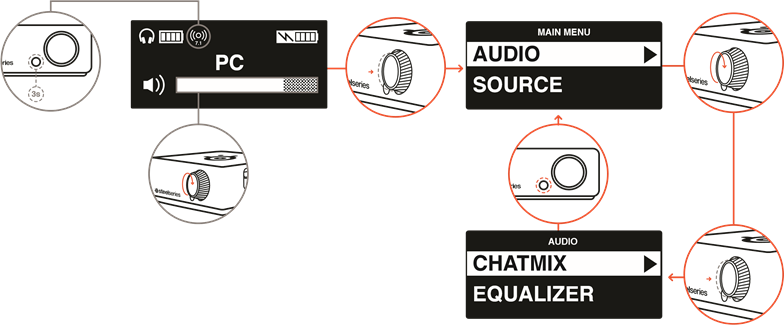
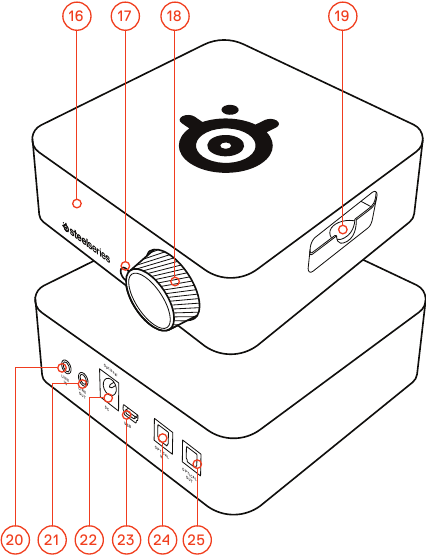
 to adjust volume
 to enter the menu (to adjust EQ, set ChatMix, and customize settings)
 to toggle surround
 to scroll through the menu
 to select menu items
 to go back one step
Find help at support.steelseries.com
Find accessories and replacement parts at steelseries.com/gaming-accessories
Accessory headbands available at steelseries.com

Here you can download full pdf version of manual, it may contain additional safety instructions, warranty information, FCC rules, etc.